Introduction
Hairstyling is an art, and braiding is one of the most classic, beautiful forms in that art. But manual braiding takes time, dexterity, and patience. Enter the automatic hair braider (sometimes called a hair twister or braiding tool), a gadget designed to mechanize the process of braiding strands of hair into twists, plaits or dreadlock styles. These devices are gaining popularity for personal/home use as well as in salons, especially for clients who want well-formed braids quickly.
A good automatic braiding set (with accessories, attachments, etc.) essentially becomes a hairdressing kit focused on braiding. In this article, we’ll explore everything you need to know about them.
What Is an Automatic Hair Braider / Hairdressing Braiding Set?
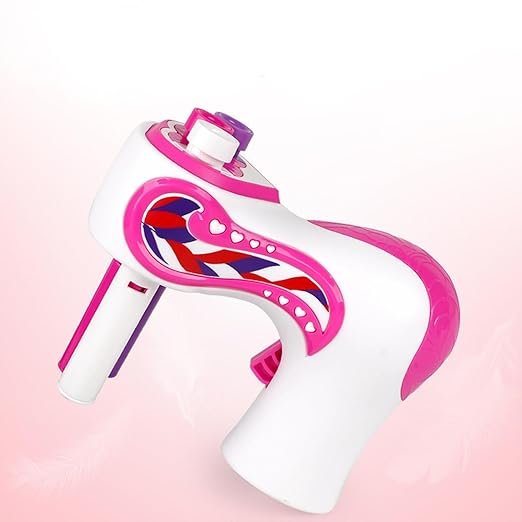
An automatic hair braider is a tool that takes strands of hair and, via motorized rotation or twisting, weaves them into braids automatically or semi-automatically. The user typically engages the tool (via a button or twist mechanism) and the strands are held in place, twisted, and formed without manual plaiting.
A hairdressing set incorporating an automatic braider might also include:
Multiple attachments / heads (for different braid widths, number of strands)
Combs, sectioning tools, clips
Extra hooks or braiding arms
Power adapters or rechargeable batteries
User manual, cleaning tools, spare parts
Together, they allow both beginners and stylists to experiment with braiding styles more efficiently.
How Do Automatic Hair Braiders Work?
While designs vary, the fundamental mechanism of these tools includes:
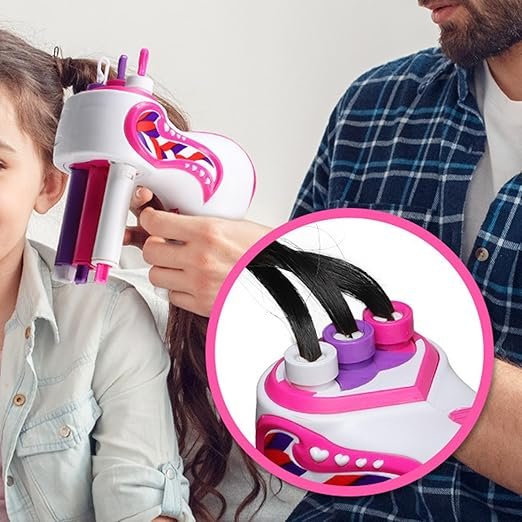
Hair Holding Mechanism
You divide hair into strands and clamp or hook them into holders. These holders keep tension as the braid forms.
Motor / Drive System
A small electric motor drives rotation or twisting of the strands, pulling them through a braiding path.
Braiding Arms / Hooks
The device typically includes rotating hooks or arms that move automatically in a pattern (e.g. 3-strand rotation), wrapping strands over one another.
Control Interface
A button, lever, or switch lets you start/stop, adjust speed, or reverse direction if needed.
Adjustability
Many devices let you adjust tension, spacing, or which attachment you use (narrow, wide, more strands, etc.).
Power Source
These may run on batteries, rechargeable batteries, or a plug-in adapter (depending on model).
Some modern designs also let you reverse the braid or do more complex patterns (twists, dreadlock style, etc.).
BrandsMart USA
+1
Benefits & Drawbacks
Like any tool, automatic braiders come with pros and cons.
Benefits
Time Efficiency: Automates what would take several minutes by hand.
Consistency: Braid tension, spacing, and neatness are often more uniform.
Ease for Beginners: Even those who struggle with hand braiding can get clean results.
Reduced Fatigue: Less strain on fingers & wrists.
Versatility: Some tools support many braid styles (French braid, twists, dreadlock styles) with changeable attachments.
Drawbacks / Limitations
Cost: More expensive than simple manual tools or combs.
Limitations on Hair Type: Very thin, slippery, or very curly hair may slip or tangle. Soft, damaged hair may break.
Bulk / Size: Devices take up space; the braiding head can be a bit bulky.
Noise and Vibration: Lower-end models might vibrate or be noisy during operation.
Maintenance / Parts: Blades, hooks or motor parts can wear and may need replacement.
Learning Curve: While easier than manual braiding, achieving perfect result may need practice.
Features to Look For in a Good Automatic Hair Braider
When shopping, keep an eye on these key features:
Feature Why It Matters What to Look For
Strand / Braid Capacity Can it handle thick or many-strand braids Options for 2, 3, 4+ strand braids
Speed Control / Reversibility Adjust for different hair textures or styles Variable speed settings, a reverse function
Attachments / Interchangeable Heads Increases utility & styles Several hook heads, braid width plates
Grips / Stability To avoid slippage while working Ergonomic handle, non-slip grip surface
Power / Battery / Adapter For convenience & portability Rechargeable battery or compatible voltage
Ease of Cleaning & Maintenance To prolong life Detachable parts, smooth surfaces
Support / Spare Parts For long-term use Availability of extra hooks, motors, warranty
How to Use an Automatic Hair Braider: Step-by-Step
A typical sequence might look like:
Wash & Detangle Hair
Start with clean, dry (or slightly damp) hair. Use a conditioner if needed to reduce friction.
Section Hair
Divide hair into the number of strands the braider supports (e.g. 3 parts). Use clips to hold rest aside.
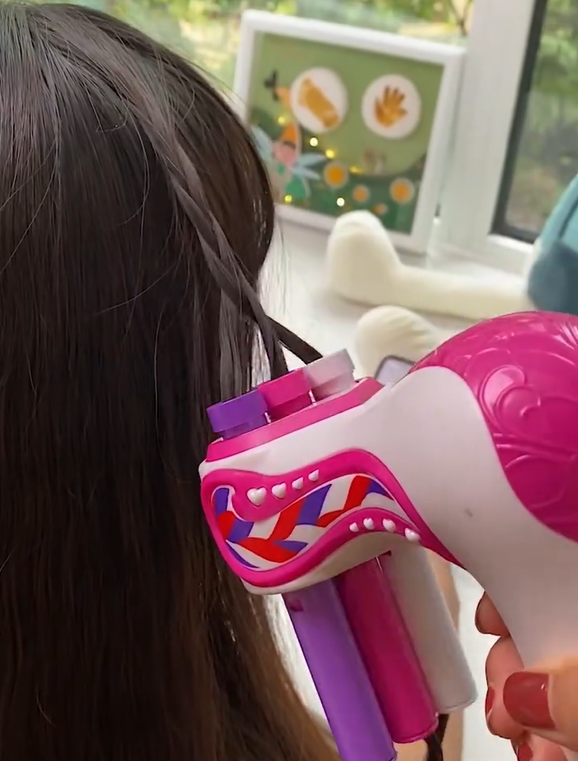
Insert Strands into the Tool
Hook each separate strand into the specific slots or holders of the braider.
Adjust the Braiding Head / Tension
Make sure each strand has even tension and the hook is placed properly.
Start the Device
Press the button or twist to begin braiding. Let it rotate until the braid is complete to your desired length.
Stop & Release
Turn off the device, gently release the strands, and tie off the braid (if needed).
Finishing Touches
Gently smooth flyaways with a bit of serum or light spray.
Clean & Store
Remove hair from holders, clean hooks/arms, and store safely.
With practice, you’ll reduce errors like hair getting caught, uneven tension, or skipped stitches.
Popular Models / Examples
A few highlights:
Automatic Quick Twist Twister Hair Braiding Tool — A compact braiding tool useful for everyday braids.
Cpixen Twist Twister Hair Braiding Tool Automatic Smart DIY — A “smart DIY” model that may offer extra settings or attachments.
Electronic Quick Twist Hair Braiding Tool — A budget-friendly electronic option for casual users.
These illustrate how features vary: some are ultra-basic power twisters, others include more “smart” features, multiple heads, or design optimizations.
Maintenance & Care Tips
To keep your tool working smoothly:
Clean hooks and arms after each use to remove hair residues.
Use a soft brush to remove fine hairs caught in tight crevices.
Avoid pulling or forcing hair when strands jam.
Store in a dry, cool place to protect motor parts.
Replace worn hooks or switching heads as needed.
Occasionally, run the tool empty (no hair) to check for vibrations or irregular motion—this helps detect misalignment early.
Use Cases & Applications
Automatic hair braiders are suitable for a range of users and settings:
Home Users / Enthusiasts: For daily braids, kids’ hairstyles, or trying fun braid styles without the manual hassle.
Salons / Stylists: To speed up braid services or for clients who want multiple uniform braids.
Events / Fashion Shows: For quick styling of multiple models or clients.
Tutorial / Content Creators: For bloggers, YouTubers creating braid tutorials—they can produce consistent results quickly.
Gift / Personal Use: For those who braid hair often or want to simplify their morning routine.
However, for extremely complex, high-end braids, stylists may still prefer manual or professional braiding techniques.
How to Choose the Right Braider for You
Future Trends & Innovations
There are signs of more advanced hair-styling robotics emerging. For example:
Researchers are exploring robotic systems that can manipulate strands at the root for front hair styling automatically.
arXiv
Soft robotics for hair care tasks is another area under study—machines that can gently grasp and style hair with compliance and visual feedback.
arXiv
While these are mostly experimental now, commercial devices may become more intelligent (vision integration, touch feedback, AI styling) in the future.
Final Thoughts
An automatic hair braider / hairdressing braiding set brings mechanization and convenience to an otherwise intricate manual task. For many users—whether at home or in small salons—these tools offer a practical shortcut to neat, consistent braids with less effort.
When selecting one, focus on strand capacity, motor strength, attachments, ease of use, durability, and availability of spare parts. The product examples above offer a starting point to see how features vary across models.